Understanding the workings of your toilet and mastering one of the most essential yet often overlooked aspects of home plumbing can save you time and money, especially when it comes to the toilet float.
This crucial component controls the water level in your toilet tank, and knowing how to adjust it can solve many common toilet issues.
Whether you’re dealing with a running toilet, a weak flush, or an unusually high water bill, the culprit might be your toilet float. This small but crucial component controls the water level in your toilet tank, and knowing how to adjust it can save you from unnecessary stress and expenses.
In this guide, I will demystify the toilet float, helping you understand its function, identify when it needs adjustment, and most importantly, guide you through the process of adjusting it yourself. So, grab your tools and let’s dive into the world of DIY toilet maintenance!
What is A Toilet Float?

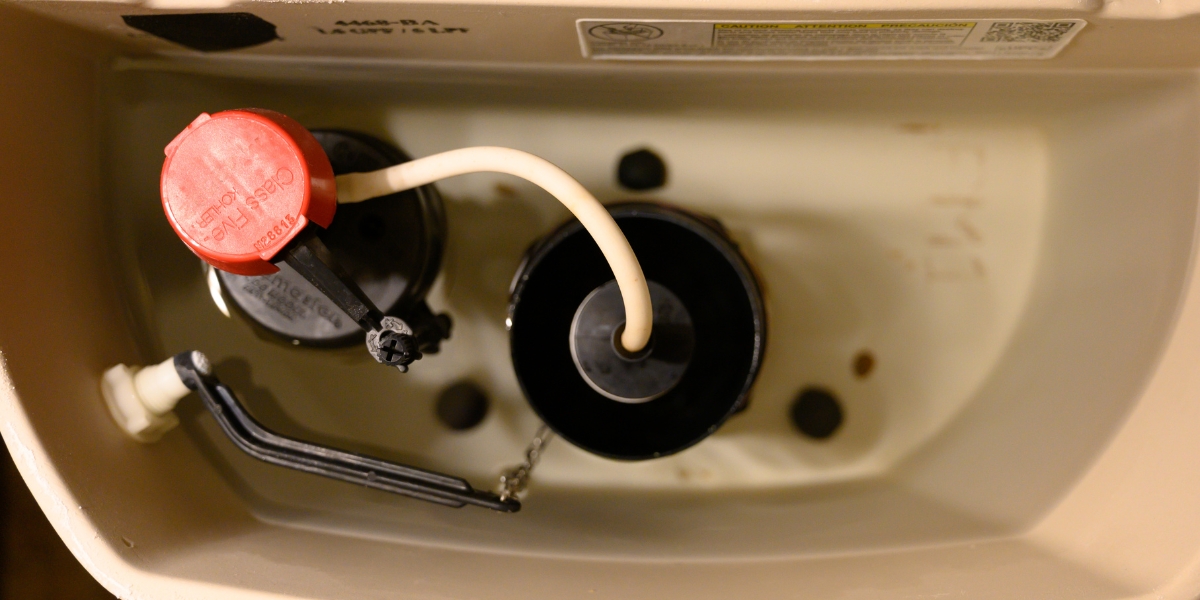
Ever wondered what that floating device inside your toilet tank is? That’s your toilet float! A crucial part of your toilet’s fill valve mechanism, it controls the water level in your tank.
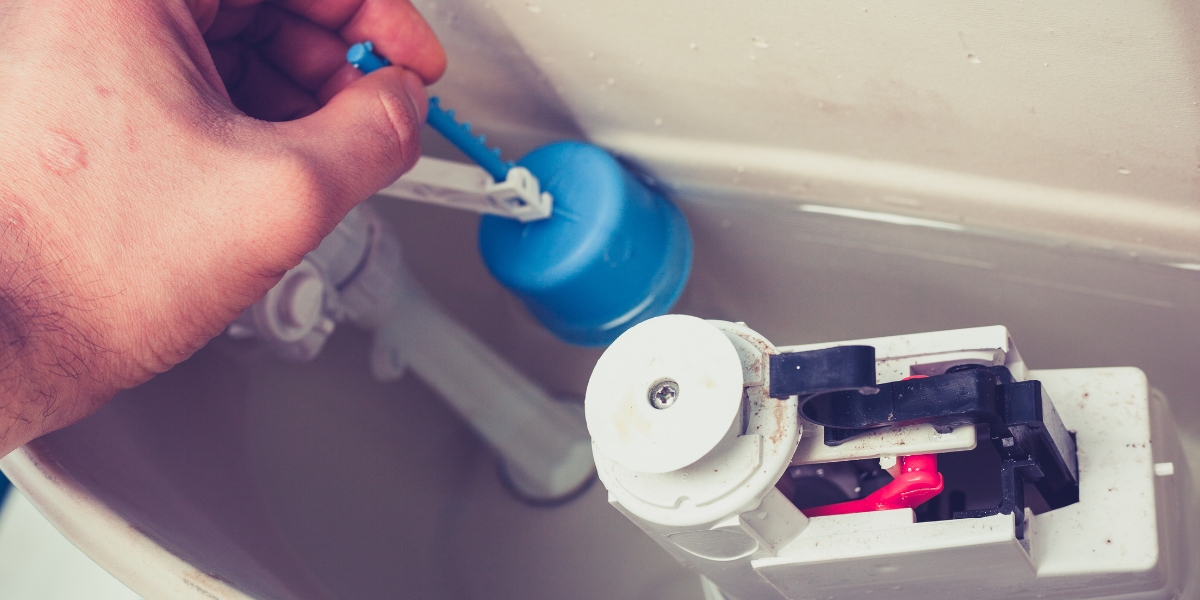
The toilet float is a small but mighty component of your toilet system. It comes in three main types, each with its unique characteristics:
- The Classic Float Ball: This is the old-school type of float. It’s a round plastic ball attached to a rod, known as a float arm. You’ll find this type mostly in older toilet models.
- The Modern Float Cup: This is a smaller, more compact float that moves up and down along the fill valve shaft. It’s a common sight in modern toilets.
- The Advanced Internal Float: This is the newest kid on the block. The internal float is integrated within the fill valve itself, providing a quieter and smoother refill process.
Understanding the type of float your toilet has is the first step in learning how to adjust it.
How a Toilet Works
The toilet float plays a vital role in the flushing and refilling process of your toilet.
The flush begins. When you push the flush lever, the water in the tank rushes into the bowl, causing the float to drop.
The refill commences. The drop in the float opens the fill valve. This allows water from your supply line to start refilling the tank
The float rises. As the water level in the tank rises, so does the float. When it reaches a set level, it shuts off the fill valve, signaling the end of the refill process.
Understanding this process is key to diagnosing and fixing common toilet issues.
When to Adjust Your Toilet Float

Knowing when to adjust your toilet float is key to maintaining an efficient toilet. Here are some signs:
- Running Toilet: If your toilet seems to be in a perpetual state of flushing, with water continuously flowing into the overflow tube, it’s a sign that your float is set too high.
- Weak Flush: A low water level in the tank, indicating a float set too low, can result in weak flushing.
- Low Water Level in the Bowl: If the bowl water level is below normal, your float may need adjustment.
- Slow Tank Refill: A slow-filling tank could indicate a problem with your fill valve or float.
Now that we’ve discussed the possible signs that your toilet float needs adjustment, let’s dive into the process of adjusting it. Whether you have a float ball, float cup, or an internal float, we’ve got you covered.
Taming the Float Ball
The float ball or ballcock is the classic type of toilet float. Here’s how to adjust it:
- Locate the Adjustment Screw: This is found where the float arm connects to the fill valve.
- Turn the Screw: Use a screwdriver to turn the screw. Turning it clockwise lowers the water level, while turning it counterclockwise raises it.
Remember, small adjustments can make a big difference, so turn the screw gradually and check the water level after each adjustment.
Adjusting the Float Cup
The float cup is a common sight in modern toilets. Here’s how to adjust it:
- Find the Adjustment Rod: This is a small plastic rod attached to the float cup.
- Move the Float Cup: Slide the float cup up or down the adjustment rod to change the water level. Up for a higher water level, down for a lower level.
Again, make small adjustments and check the water level after each one.
Fine-Tuning the Internal Float
The internal float is the newest type of toilet float. Here’s how to adjust it:
- Locate the Adjustment Dial: This is usually found on the top of the fill valve.
- Turn the Dial: Rotate the dial to adjust the water level. Clockwise for a lower level, counterclockwise for a higher level.
As with the other types of floats, make gradual adjustments and check the water level after each one.
When to Wave the White Flag

While adjusting your toilet float can fix many common toilet issues, there are times when replacement is the best option. If your float is damaged, or if adjustments don’t solve the problem, it might be time to replace your toilet float. Don’t worry, though – with the skills you’ve learned, you’re more than ready to tackle this task!
Toilet Float Care and Maintenance
One of the key components in your toilet that requires regular attention is the toilet float. This small but crucial device controls the water level in your toilet tank and plays a significant role in the overall efficiency of your toilet. In this article, we’ll guide you through the process of taking care of and maintaining your toilet float.
Regular Inspection
Regular inspection is the first step in maintaining your toilet float. Look for signs of wear and tear, such as cracks or damage to the float itself. Also, check the fill valve for any signs of leakage. If your toilet is running continuously, flushing weakly, or the water level in the tank or bowl is too low or too high, these could be signs that your float needs adjustment or replacement.
Cleaning the Toilet Float
Over time, the toilet float can accumulate mineral deposits, especially in areas with hard water. These deposits can interfere with the float’s movement, causing it to stick or malfunction. To clean the float, first, turn off the water supply to the toilet. Then, remove the float and clean it with a mixture of vinegar and water to dissolve the mineral deposits. Rinely thoroughly before reinstalling.
Adjusting the Toilet Float
If your toilet is running continuously or the water level in the tank is too high or too low, you may need to adjust the float. The adjustment process varies depending on the type of float your toilet has. For a float ball or ballcock, you’ll need to adjust the screw where the float arm connects to the fill valve. For a float cup or an internal float, you’ll need to adjust the position of the float on the fill valve shaft or rotate the adjustment dial on the fill valve, respectively.
Replacing the Toilet Float
If your toilet float is damaged or if adjustments don’t solve the problem, it might be time to replace the float. Most home improvement stores carry replacement floats, and the process is relatively simple. First, turn off the water supply to the toilet and flush to empty the tank. Then, remove the old float and install the new one according to the manufacturer’s instructions.
Taking care of and maintaining your toilet float is an essential part of toilet maintenance. Regular inspection, cleaning, adjustment, and timely replacement can help keep your toilet running efficiently and save you from unnecessary water waste and high water bills. So, the next time you’re doing home maintenance, don’t forget to check on your toilet float!
The Final Flush
Congratulations! You’ve now mastered the art of toilet float adjustment. With this knowledge, you can keep your toilet – old or new – running efficiently and save on unnecessary water usage. So the next time your toilet sends you signals, you’ll know just what to do. Happy adjusting!
FAQs
- What is a toilet float and what does it do? The toilet float is a part of your toilet’s fill valve mechanism. It rises and falls with the water level in the tank, controlling the opening and closing of the fill valve.
- Why do I need to adjust my toilet float? If your toilet is running continuously, flushing weakly, or the water level in the tank or bowl is too low or too high, you may need to adjust your float.
- How do I know if my toilet float needs adjustment? Common signs include a running toilet, weak flush, low water level in the bowl, or a slow tank refill.
- What are the different types of toilet floats? There are three main types of toilet floats: the float ball or ballcock (common in older toilets), the float cup (common in modern toilets), and the internal float (the newest type).
- How do I adjust a float ball or ballcock? Locate the adjustment screw where the float arm connects to the fill valve. Use a screwdriver to turn the screw. Turning it clockwise lowers the water level, while turning it counterclockwise raises it.
- How do I adjust a float cup? Find the adjustment rod attached to the float cup. Slide the float cup up or down the adjustment rod to change the water level.
- How do I adjust an internal float? Locate the adjustment dial on the top of the fill valve. Rotate the dial to adjust the water level. Turning it clockwise lowers the water level, while turning it counterclockwise raises it.
- When should I replace my toilet float? If your float is damaged, or if adjustments don’t solve the problem, it might be time to replace your toilet float.
- Can I adjust my toilet float myself? Yes, adjusting a toilet float is a relatively simple DIY task. However, if you’re not comfortable doing it yourself, you should call a professional plumber.
- What tools do I need to adjust my toilet float? You’ll need a screwdriver to adjust the float. Some types of floats may require additional tools, so it’s best to check your toilet manufacturer’s instructions.
